Bootstrap Configuration Example for VM-Series in AWS
Using the bootstrap option significantly simplifies VM-Series initial configuration setup.
In this document, we provide a bootstrap example to set up an “Allow All” and Egress NAT policy for the VM-Series to validate that traffic is indeed sent to the VM-Series for VPC-to-VPC traffic inspection. This example does not use Panorama.
Please use 9.0.3.xfr and above .xfr version for better results. Please refer to PAN-OS 9.0.3 XFR for VM-Series .
Note that Panorama PAN-OS version should be the same or higher than the firewall VMs when they are added to the Panorama, like, 9.0.3.xfr for both Panorama and VMs.
For a manual setup, follow the manual setup example.
Creating an IAM Role and Policy
Log in to AWS console and create an IAM role with the name: for example, “bootstrap-VM-S3-role.”
Attach an IAM policy with the name: for example, “bootstrap-VM-S3-policy.” The policy has the following statements.
{
    "Version": "2012-10-17",
    "Statement": [
        {
            "Effect": "Allow",
            "Action": [
                "s3:ListBucket"
            ],
            "Resource": [
                "arn:aws:s3:::*"
            ]
        },
        {
            "Effect": "Allow",
            "Action": [
                "s3:GetObject"
            ],
            "Resource": [
                "arn:aws:s3:::*"
            ]
        }
    ]
}
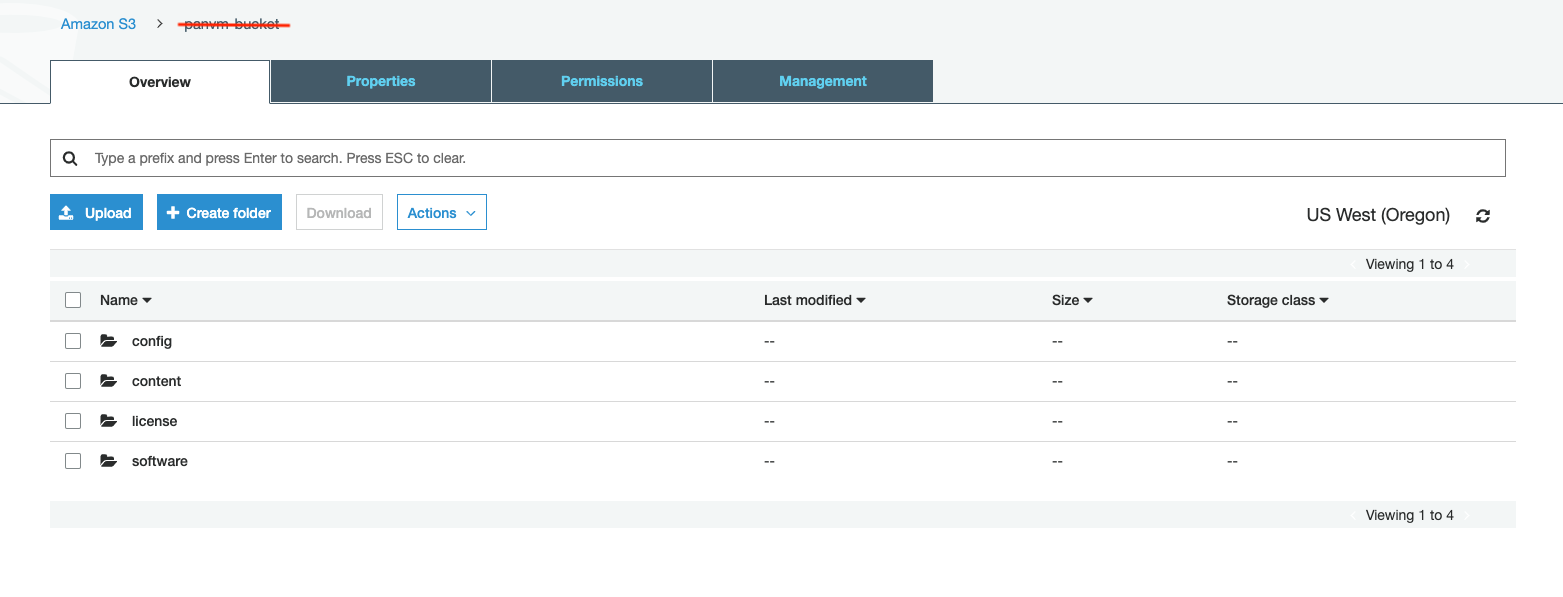
Creating the bootstrap Bucket Structure
In AWS S3, at the top level create a bucket for bootstrap with a unique name, for example “bootstrap-bucket,” with the following structure:
bootstrap-bucket/
  config/
    init-cfg.txt
    bootstrap.xml
  content/
  license/
  software/
Uploading Config Files
The example bootstrap.xml file contains the “Allow All”, Egress and API admin setup. To download the file, click
bootstrap.xml.For the example init-cfg.txt file, click
init-cfg.txt.
Note
In the example bootstrap.xml, you must specify custom usernames and passwords for the <https_interface_admin_username> and <api_admin_username>, and generate hash strings for the passwords.
Upload these two files to your config folder in the bootstrap-bucket.
Launching the VM-Series instance
Follow the Aviatrix Firewall Network (FireNet) workflow to this step.
Fill in the required fields. Click Advanced. Fill in the following parameters.
Advanced Field |
Example Value |
|---|---|
IAM Role |
bootstrap-VM-s3-role |
Bootstrap Bucket Name |
bootstrap-bucket (must be a unique name in S3) |
Launch the VM-Series instance. Wait for 15 minutes for it to boot up and initialize.
Login to the HTTPS interface of VM-Series management public IP with the username and password specified in the bootstrap.xml file.
Configuring API Vendor Integration
In order for the Aviatrix Controller to automatically update firewall instance route tables, monitor the firewall instance health and manage instance failover, you need to setup API access permissions.
Go to Controller -> Firewall Network -> Vendor Integration -> Firewall. Note the following fields.
Firewall Login User Name field, use the username specified in the bootstrap.xml file.
Firewall Login Password field, use the password specified in the bootstrap.xml file.
If you are manually configuring the firewall from scratch, follow the instructions here to enable API access.
Ready to Go
Now your firewall instance is ready to receive packets.
The next step is to specify which Security Domain needs packet inspection by defining a connection policy that connects to the firewall domain. This is done by here in the Firewall Network workflow.
For example, deploy Spoke-1 VPC in Security_Domain_1 and Spoke-2 VPC in Security_Domain_2. Build a connection policy between the two domains. Build a connection between Security_Domain_2 to Firewall Domain.
Launch one instance in Spoke-1 VPC and Spoke-2 VPC. From one instance, ping the other instance. The ping should go through.
Viewing the Traffic Log
You can view if traffic is forwarded to the firewall instance by logging in to the VM-Series console. Click Monitor. Start ping packets from one Spoke VPC to another Spoke VPC where one or both of Security Domains are connected to Firewall Network Security Domain
Additional References
Following links from Palo Alto Networks for PAN-OS 8.1 and 9.0 provides additional information.